DCC for the RCX
Background:
I've been a LEGO enthusist since I was a little boy, and now my youngest son has really started getting into trains. I decided to create the best of both world and invest in some LEGO Trains. We started out with the new Power Functions line, but we were using up a LOT of batteries, so I started researching better ways. I came across various posts that mentioned using Enloop batteries instead since they were rechargeable and had a predictable runtime. That worked for a while, but it was always a pain to tear a train half apart to swap batteries, and reassemble. Next I came across the old 9v technology. Just like model railroading, we could finally run our trains for hours without any interruptions! The only downside was we could only run one train at a time, if we could figure out how to run multiple at the same time we would be in heaven. That's when I heard about DCC from the model railroading side of things. If only there was a way to bridge DCC and LEGO together. Slowly I started finding old posts touching on the subject, as well as a bunch of dead links that sounded promising. It seems that a lot of the information on this subject has disappeared over the years, or is really hard to find. I decided to make a page to aggregate a bunch of the information from various sources.
Special thanks to Mark Riley for originally developing the DCC software for the Lego RCX brick. I have been unable to find any contact information for him, so hopefully he won't mind that I am posting his firmware and a lot of his documentation for others to use. Hopefully this page will also make other people's journey a little easier than mine was!
Disclaimer:
This software is distributed on an "AS IS" basis, WITHOUT WARRANTY OF ANY KIND, either express or implied. The author assumes no responsibility for any property damage or personal injury resulting from the use or misuse of this software. Please exercise caution.
Comments/Questions/Help:
Equipment Required:
Besides the usual train stuff (track, connection wire, etc...), you'll need the following to run LDCC:
- Lego RCX - Version 1.0 as it has a power input jack for long time running. The other models will work but will use batteries quickly.
- Lego RCX Remote Control (optional), can also use Dr. Vegetable's "Virtual Remote Control"
- Lego 2x8 Electrical Plate Part# 4758
- DCC Equipped Train Motor HOWTO
- Acknowledgement Circuit (Optional) HOWTO
- BricxCC (optional) - Used for downloading the source code to the RCX, and writing code for automation.
Firmware
- LDCC 1.0.0 by Seibz - Written in C: Version 1.0.0
- SRC: LDCC 1.0.0 by Seibz: SRC Version 1.0.0
- Ubuntu Development Workstation - Coming Soon
- Mark Riley's Firmware: Version 1.05
Terminology
- Decoder - This is a small module that you install in a standard LEGO® train motor. Check out the Train Decoder section for more info, or Tom Cook also has an excellent page covering the installation process.
- Command Station - This is the DCC component that generates the electrical signals sent over the tracks to communicate with the DCC decoder in the locomotive. This function is performed by the RCX with the LDCC firmware.
- Configuration Variable (CV) - Decoders have a number of configuration variables that can be used to adjust the behavior of the decoder. The values stored in these variables are persistant and will be retained even after power has been removed from the track. The manufacturer of your decoder will supply you with a list of CVs supported by your specific decoder. See the Decoder Programming section.
- Decoder Address - Each decoder typically has a unique address assigned to it to differentiate it from other decoders. The address is in the range 1 to 127. Before you can use a decoder on your layout, you need to assign an address to it. This is done by programming the address into CV #1. See the Decoder Programming section. Note: DCC also has the notion of a "long address" which can extend the address range up to 9999. However, LDCC currently does not support this feature.
- DCC Booster - Divide your layout into multiple power districts, each powered by a slave RCX. This will allow you to have more trains in motion at the same time.
- DCC Stationary Decoder - Control up to 3 motorized switches per RCX from the RCX remote control or from a program you write for another RCX or PC.
- LDCC IR Protocol - Control the trains and switches on your layout remotely from another RCX or PC program.
- Tethered Throttles - Allows up to 3 additional people to control trains on the layout by using tethered throttles made using a rotation sensor or potentiometer.
Setup
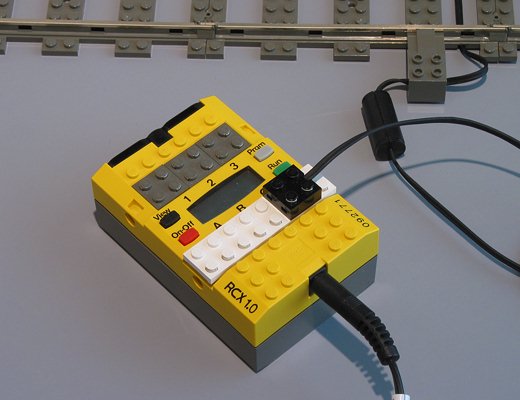
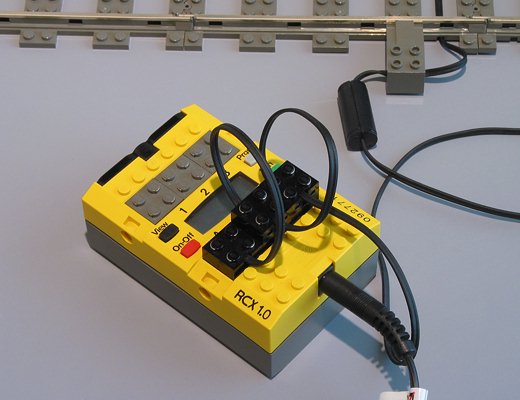
In order to have enough power to drive multiple locomotives, you need to hook up the motor outputs of the RCX in parallel. Click on the images below for larger views of the various methods. It's important to hook this up correctly - if you have any questions feel free to contact me.


If you want, you can attach a lamp brick to one of the track connection wires. This will let you know when power is applied to the track.
I've been able to run two locomotives with 5-6 cars each using this setup.
Caution: It's quite conceivable you could overload your RCX if you operate too many locomotives or trains that are too long. Do so at your own risk. If you notice that the trains are starting to slow down for no reason (besides a curve), turn the power off to the RCX immediately and let it cool down.
Basic Operation
When you first power up LDCC, it starts in Stand-by Mode. In this mode, no power is applied to the tracks, but the RCX will listen for commands from the remote control. Once locomotive commands are received from the remote control, LDCC will shift to Run Mode. In this mode, power is applied to the tracks and commands are issued to the locomotive over the rails.

|

|
| Stand-by | Run |
LDCC can handle up to 9 locomotives at a time. These are referred to as Loco #1, #2, etc... By default, the initial decoder address assigned to each Loco is the same as the Loco number. For instance, Loco #3 controls the decoder with address 3. If you wish to change the address assignments, see the Decoder Programming section.
The arrows on the RCX remote control are used to change the speed and direction of your locomotives. The A arrows control Loco #1, the B arrows control Loco #2, and so forth. Since there are only 3 sets of arrow keys, you can only control 3 locomotives at a time with the remote. To control Locos #4 - #6 press Beep + 2 and then start using the arrow keys as normal. For Locos #7 - #9, press Beep + 3. To return to controlling Locos #1 - #3, press Beep + 1.
The longer you hold an arrow key down, the faster the locomotive will go in that direction. Press the arrow keys briefly if you want to make small adjustments in speed. Holding both the up and down arrow keys down at the same time will stop the locomotive. The locomotive headlight can be toggled on and off by pressing the numbered button above the arrow keys.
Make sure the remote or usb tower is pointed at the RCX so that your commands are reliably obeyed (this is important if you want to avoid derailments!)
| Run Mode: | |
| On-Off | Toggle RCX power |
| View |
Selects other modes:
Drct - Direct Mode Programming PHYS - Physical Register Programming PAge - Paged CV Programming Loco - Locomotive Options ConS - Command Station Consisting |
| Run | Toggles between Run and Stand-by modes |
| Beep+1 | Selects Locos #1 - #3 |
| Beep+2 | Selects Locos #4 - #6 |
| Beep+3 | Selects Locos #7 - #9 |
| Up, Down | Adjusts speed and direction of Loco |
| Up+Down | Stops Loco (both arrow keys pressed down simultaneously) |
| 1, 2, 3 | Toggles headlight function on/off (FL) |
| Stop | Stops all Locos. If pressed more than once, toggles between Run and Stand-by modes. |
 Seibz
Seibz